Build a Social Feed Node Js
How I Built a Full-Featured Social Media Application With React Native and NodeJS
5 best practices to developing React Native, NodeJS full-stack applications
Over the last number of years concerns over the safe use of social media applications have featured our news feed in waves. Most recently, the ban of China's TikTok and WeChat by the US government comes to mind, along with Facebook who have receive public scrutiny by governments and the public alike for its wrongful handling of private user data.
So I decided to build my own social media application:
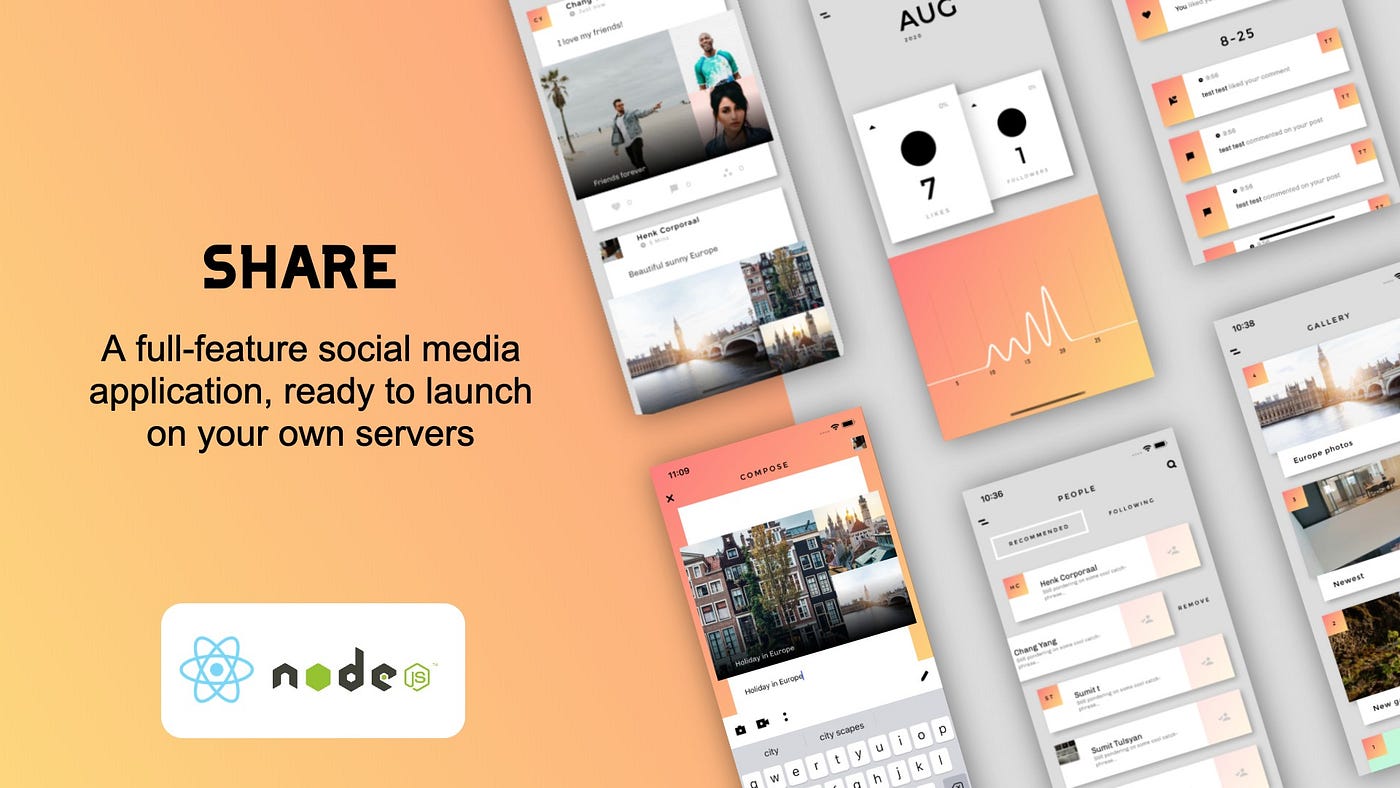
SHARE is a is a full-featured cross-over between Twitter, Snapchat and Instagram, but with its own look & feel, and ready to be deployed by any person, company or organisation on their own private servers.
The realisation of this application took me on a journey through the unexplored, and this article I will talk in more detail about some of the most important decisions that helped make this application a reality.
Want to check out the app? Share is now live and available to test and purchase through this link.
Selecting the right tech stack
SHARE consists of a React Native supported mobile app that is connected to a NodeJS api server application. Selecting this technology stack was no overnight decision. Let me explain…

I was not always a React Native developer. Previously, I worked at a company developing custom Xamarin mobile applications for local businesses. During that period we sometimes discussed React Native between co-workers, which often lead to off-hand remarks, like:
"Our applications need to function offline. I don't believe it can be done with React Native."
→ It can be done"We offer local notification. Is it possible with React Native?"
→ It is possible"We separate data view models from view render logic. Is that even possible with React Native?"
→ Keep reading!
Meanwhile, our company had one guy developing our apps's .Net core features, another guy writing the Android app and a third guy writing the iOS application. On top of that, Xamarin (non-XAML) still lacks hot-reloading capabilities and its documentation is dreadful.
There must be better ways to develop applications, is what I kept thinking . And so, being already familiar with React, I gave React Native a go.


Working on SHARE brought back the fun of developing mobile applications. But what's perhaps more interesting, using the
MongoDB — Express — React-Native — NodeJS
tech stack turned what used to be a three-man job into a one-man job.
Complete the frontend first, then build out the backend
Dipping your toes into full stack development for the first time, it is tempting to dive right into writing the frontend and backend code, all at the same time. You want to see those features that look beautiful on paper turned into reality.
I will argue this is a bad idea.
For me, the fun of developing is about creating beautiful screens, views and elements. It is about seeing the fruits of your labour and watching your app become reality.
Each new screen boosts the believe that your app will soon become a reality.
Spending too much time thinking of backend solutions for backend problems therefore does not help to make that important initial progress. What it does do is distract from creating a prototype application that can be leveraged to:
- Create a pool of beta testers to test your UI, features and collect feedback.
- Initiate promotional efforts and bring together a community of potential buyers that you can turn to for your first sales once your final app is complete.
- And perhaps most importantly, to focus on as few tasks as possible, which will dramatically improve the quality of your application and save you a lot of time and painful experiences later on.
So if this means you need to create a bunch of dummy data to help you complete your frontend app more quickly, then that is what you should do.
In my case, once I finished the frontend application, I put it up for sale as a UI starter kit while I continued work on the backend app.
Separating displays from data
Storing and transforming data and handling data calls in the SHARE mobile app is handled by Redux and Redux-Saga.

An often heard complaint about using Redux for storing data is the amount of boilerplate code that accompanies this type of setup.
In my view, what some see as boilerplate code could (and should) be considered as a useful way to distinguish between the app's view layers on the one hand and its business logic (transferring, modifying and storing data) on the other.
This structure, which is also referred to as Model-View-ViewModel (MVVM), is an accepted software architectural pattern by which data can be managed in a way independent from an application's display logic.
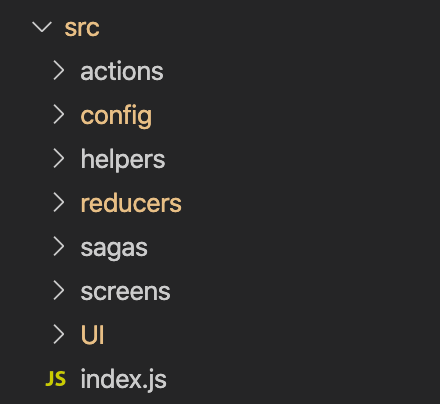
Each of the actions files, reducer files and saga files that support the Redux store are a great way to implement MVVM. Setting up this type of file structure helps achieve two important things:
- Files are set up to focus on one important thing only. For example, a file with code to render a particular view will only contain references that impact how that particular view is rendered.
- An experienced developer opening any file in the application will know from the get-go what the purpose of that particular file is. This makes the application very manageable.
Structuring backend code
Maintaining consistency in naming conventions is key in creating an easy to understand backend app that is easy to debug.
Consistency in the SHARE api server application contains a two-layered approach:
- All Models, Controllers and helper functions are referenced by the exact same names.
- All 'get', 'build', 'find', and 'delete' functions are async and follow the same pattern.
The backend file structure almost exactly resembles how data models are set up on the frontend side.

What's more, all Mongoose calls throughout the backend app are await-able. The general idea here is to avoid awfully long waterfall callback functions that seem to never end and are a pain to debug.
An interesting article that I took inspiration from, lays out the benefits of transitioning from callbacks to async-await functions. Following this logic, all api request can now be traced following one simple model:
MobileApp API Call → Router → Controller → Service Helper (get/build/find/deleteFromRequest(req)) → Controller → MobileApp
With this model in mind, modifying and debugging the backend app has become a mostly painless experience.
Develop with your audience in mind
Having zoomed in on the technical implementation of the SHARE app might raise the concern that the app may not be for non-developers. Nothing would be further from the truth.
Anybody who can follow along with a clear set of step-by-step instructions will be able to install and deploy this application.
For non programmers I created an app that is easy to customise, and includes customisation options, such as:
- fonts, colors and style features
- animation types
- screen names
- simple enabling or disabling of numerous app functionalities
For beginning programmers, I created an app that is full of code examples and best practices to learn any of the following:
- How to create flexible, reusable, custom components with React Hooks and React Native.
- How to implement simple animations with React Native's Animated component.
- How to apply Redux for state management.
- How to avoid unwanted side effects that come with making simultaneous api calls.
- How to structure a MongoDB supported backend application that is performant and easy to manage.
- How to create a secure authentication flow with NodeJS.
- How to upload, store and display images and videos with NodeJS and third-party image storage.
- and lots more.
For advanced programmers, I created an app containing code with a clear and simple structure, that is easily understood, and simple to modify or extend with additional features.
In the end, it is up to you to decide if this app is right for you. I had fun and learned some useful new skills developing this application, which for me is (nearly) as important as selling you on this app.
And if you do decide to purchase SHARE, I would happily assist you with any issues you might face in the process of installing, deploying and testing your application.
And last but not least, do remember to give my app a try! Thanks for reading!
JavaScript In Plain English
Enjoyed this article? If so, get more similar content by subscribing to Decoded, our YouTube channel !
Source: https://javascript.plainenglish.io/how-i-built-a-full-featured-social-media-application-with-react-native-and-nodejs-6b7179858a69
0 Response to "Build a Social Feed Node Js"
Post a Comment